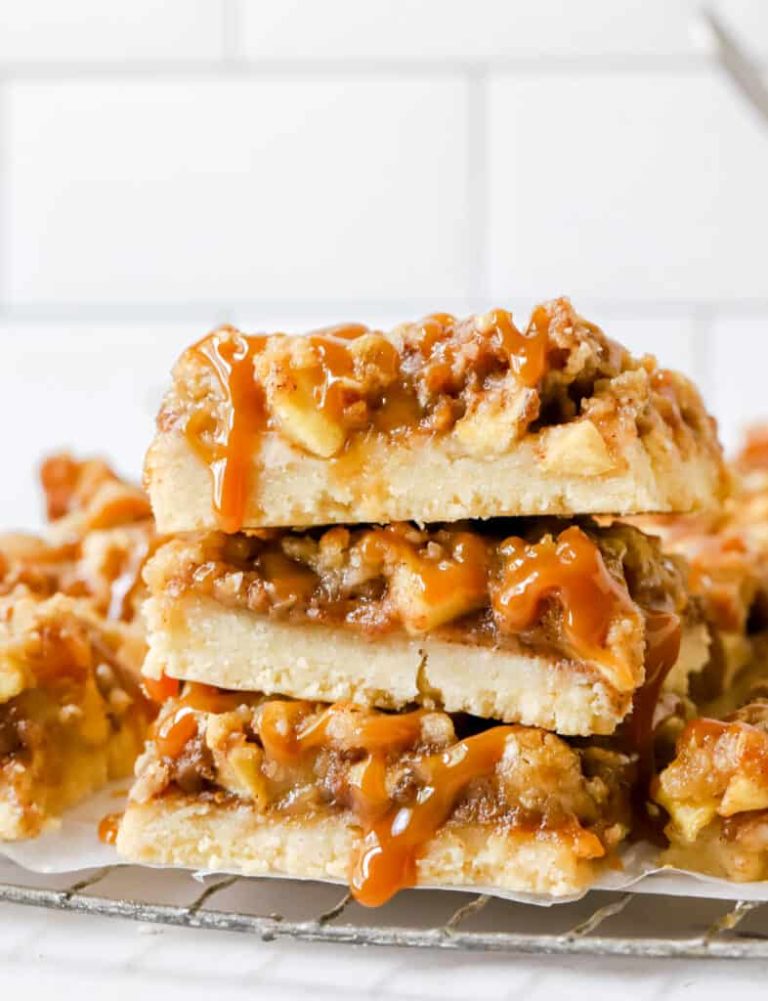
Raspberry Lemon Tart Recipe
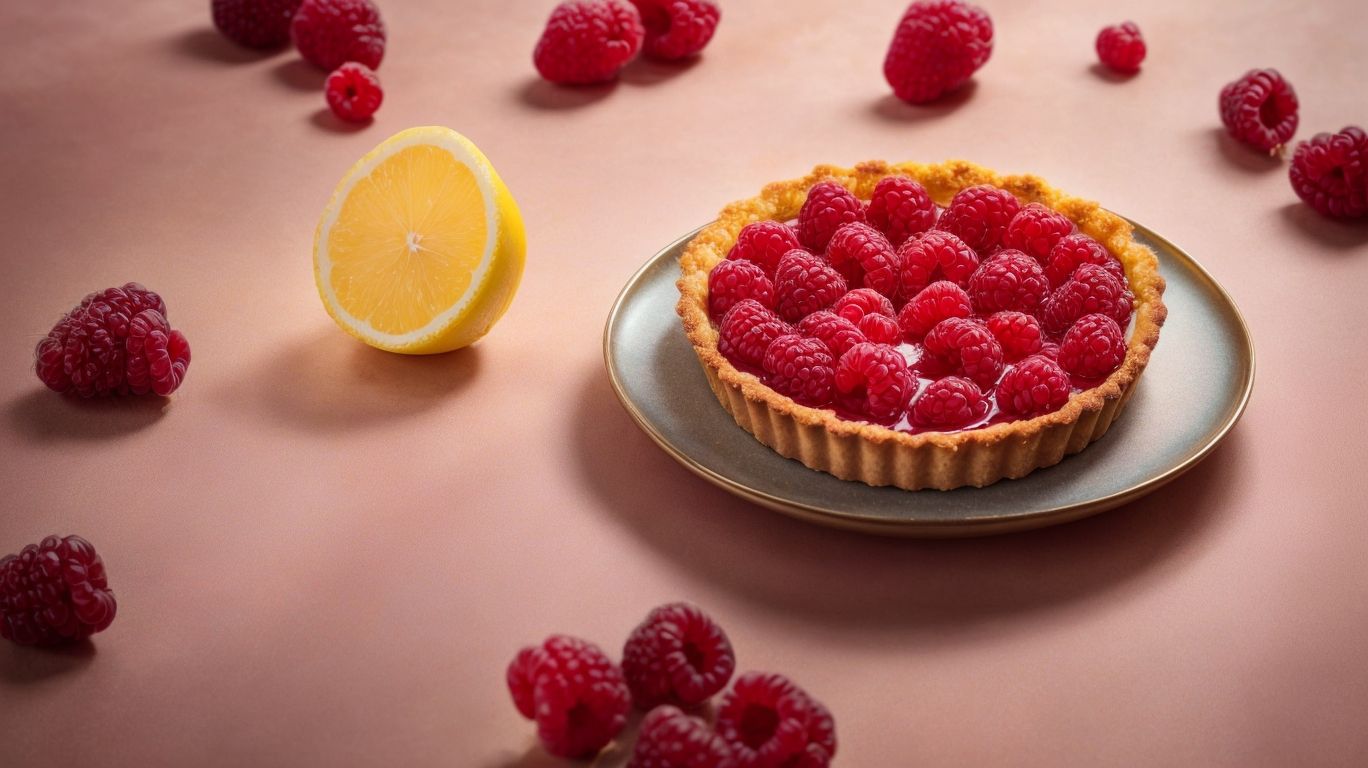
This tart’s a treat for any occasion! Combining tart raspberries and zesty lemons in a buttery crust – it’s both refreshing and satisfying.
Start with the crust: mix flour, sugar and salt in a bowl. Cut in cold unsalted butter till it resembles crumbs. Gradually add ice water until the dough comes together. Press the dough into a tart pan, and bake till golden brown. Let cool.
Create the filling by whisking together lemon zest, juice, eggs, sugar and cornstarch in a saucepan over medium heat. Cook till it thickens. Remove from heat and stir in cold unsalted butter until melted. Gently fold in the raspberries. Pour into the cooled crust and chill for two hours.
Garnish with fresh raspberries and lemon slices. For an extra burst of flavor, try drizzling raspberry coulis on each slice before serving. Impress your guests with its vibrant color!
This Raspberry Lemon Tart is sure to become a favorite. Show off your culinary skills with every bite. Enjoy!
Ingredients for Raspberry Lemon Tart
Raspberry Lemon Tart is a scrumptious mix of sweet and tangy flavors. Here’s what you need to make this delicious treat:
| Ingredients | Quantity |
|---|---|
| Graham Cracker Crust | 1 ½ cups |
| Fresh raspberries | 1 pint |
| Lemon juice | ¼ cup |
| Lemon zest | 1 tablespoon |
| Sweetened condensed milk | 1 can |
| Egg yolks | 4 |
To take your tart to the next level, add a pinch of vanilla extract. To make it look even more irresistible, top it off with fresh mint leaves or powdered sugar.
To get the best out of your Raspberry Lemon Tart, here are some tips:
- Bake your graham cracker crust until it’s crispy.
- Use organic lemons for the zest, as their natural oils give it a better flavor.
- When combining the ingredients, whisk the egg yolks gently to ensure a creamy texture.
By following these pointers, you’ll have a Raspberry Lemon Tart that looks and tastes amazing! So don’t wait, give it a go!
Step 1: Preparing the Tart Shell
Preparing the Tart Shell: A Step-by-Step Guide
- Mix the dry ingredients: Combine flour, sugar, and a pinch of salt in a mixing bowl.
- Add the butter: Cut cold, cubed butter into the flour mixture using a pastry cutter until it resembles coarse crumbs.
- Incorporate the liquid: Drizzle ice water into the mixture, stirring with a fork until the dough comes together.
- Shape the dough: Gather the dough into a ball, flatten it into a disc, and wrap it in plastic wrap. Let it chill in the refrigerator for at least 1 hour.
- Roll out the dough: On a lightly floured surface, roll out the chilled dough to fit your tart pan, ensuring it’s evenly thick.
Additionally, make sure to prick the bottom of the tart shell with a fork before baking it blind to prevent it from puffing up.
Once you have followed these steps, you will have a perfectly prepared tart shell ready to be filled with the delicious raspberry lemon filling. Don’t miss out on the opportunity to create a mouthwatering dessert that will leave everyone wanting more. Get started now and indulge in the delightful flavors of this Raspberry Lemon Tart!
Hunting down butter and sugar: the only thing more satisfying than emptying your wallet is filling your stomach with this tart shell.
Gathering the ingredients for the tart shell
Gather the ingredients for the tart shell in an organized fashion. You’ll want all-purpose flour for texture and structure. Also, get unsalted butter for richness and flavor. Sugar is next for a sweet taste. Salt will balance out the sweetness and bring out the flavors of the ingredients. Lastly, add cold water to bind all together for a crisp tart shell.
You can experiment with different types of flour, such as whole wheat or almond flour. Or, for a savory tart, add herbs or spices like thyme or paprika.
History tells us that tart shells were initially called “crustardes” and were made with rye dough. Today’s tart shells are made with flaky pastry dough.
So, when you prepare a tart, remember to gather quality ingredients and appreciate its past.
Mixing and chilling the crust dough
- Measure out the flour, butter, sugar, and salt needed for the crust dough.
- Mix the flour, sugar, and salt in a bowl. Stir until evenly distributed.
- Add small cubes of cold butter to the dry mixture. Rub the butter into the flour using your fingertips or a pastry cutter until coarsely crumbled.
- Slowly add ice-cold water while stirring with a fork or hands. Mix until dough holds together, but isn’t sticky.
- Gather dough into a ball and flatten into a disc. Wrap tightly in plastic wrap and chill for 30 min. to let the gluten relax and flavors meld.
- Take dough out of fridge and let sit at room temp. for 5 min. before rolling.
Cold butter is key for a flaky texture. Don’t overmix or overwork dough for desired tenderness.
Chilling the dough helps keep its shape while baking, giving a crispier crust. Mixing by hand aids in controlling the dough’s consistency.
Rolling and lining a tart pan can be tricky, so get ready to crack some jokes!
Rolling out the dough and lining the tart pan
Roll the chilled tart dough on a lightly floured surface. Use a rolling pin to make it a circle larger than the tart pan. Carefully place the dough in the pan. Press it into the bottom and up the sides. Trim off any excess.
Decorate, crimp, or use a fork to finish the edges of the tart shell. Freeze for 30 minutes before baking. Brush egg wash or melted butter over the lined tart dough. For a golden & crisp crust.
Serve up a delicious tart and hope it’s better than your last relationship – no emotional scars this time!
Step 2: Making the Raspberry Lemon Filling
Making the Raspberry Lemon Filling involves a series of steps that contribute to its delicious flavor and smooth consistency. Here is a simple guide to help you create this delectable filling:
- Start by combining fresh raspberries, lemon juice, and lemon zest in a mixing bowl.
- In a separate bowl, whisk together eggs, sugar, and cornstarch until well combined.
- Slowly pour the egg mixture into the raspberry and lemon mixture, stirring continuously.
- Transfer the mixture to a saucepan and cook over medium heat, stirring constantly, until it thickens and coats the back of a spoon.
- Remove from heat and let the raspberry lemon filling cool before using it in your tart.
To add a unique touch to your filling, you can experiment with different ratios of raspberries to lemon juice, adjusting the sweetness and tartness levels to suit your taste. Enjoy!
True fact: Raspberries are a rich source of antioxidants and vitamin C, providing numerous health benefits. (Source: Healthline)
Stock up on lemons and raspberries, because this tart is about to give your taste buds a punchline they won’t forget!
Gathering the ingredients for the filling
Gather the ingredients for a tasty filling by following these simple steps:
- Raspberries: Pick fresh, firm and vibrant-red hued raspberries.
- Lemons: Look for fragrant and juicy lemons. Choose ones with smooth skin and no visible blemishes.
- Sweeteners: Balance out the tartness with a sweetener like granulated sugar or honey.
You may also add a pinch of salt or cornstarch to adjust the consistency and enhance the taste. Top-notch ingredients are key to an extraordinary Raspberry Lemon filling.
Fun fact: Research from Food Chemistry journal suggests that raspberries’ antioxidants contribute to their color and potential health benefits. Create a tangy masterpiece with this raspberry and lemon mixture – it won’t drive you to pulp fiction!
Cooking the raspberry and lemon mixture
For a tasty raspberry and lemon mixture, follow these steps:
- Measure out raspberries and lemons.
- Put the raspberries, lemon juice, and zest in a saucepan.
- Simmer on medium-low heat, stirring continuously.
- As the berries break down and release their juices, stir gently.
- Keep cooking until the mixture thickens, forming a syrup.
- Remove from heat and let cool before using as a filling.
This recipe creates a vibrant hue in the filling, and its unique flavor has an interesting story. It is said that a pastry chef made it while experimenting with different flavors for his tart. The tart was a hit and people came back for more. So the chef shared the secret recipe and now raspberry lemon desserts are popular worldwide.
Finally, strain the filling and let it cool for a smooth and chilled result.
Straining the filling and cooling it down
To make raspberry lemon filling, strain and cool it! Here’s how:
- Set up a strainer. Place a fine-mesh strainer over a bowl or container big enough to hold the filling. Make sure it’s clean.
- Pour in the filling. Carefully pour the prepared raspberry lemon filling into the strainer. The fine mesh will catch any lumps or seeds.
- Cool it down. Let the strained filling cool to room temperature before using or storing in the fridge. This helps flavors mix and sets the texture.
Once strained and cooled, your raspberry lemon filling is ready to use in desserts like pies, tarts, or cakes. It adds delicious flavor and vibrant color to your treats! Plus, raspberries are full of vitamins C and K, fiber, antioxidants, and other healthy nutrients. Enjoy!
Step 3: Assembling and Baking the Tart
Step 3: Assembling and Baking the Tart
- Prepare the tart shell by rolling out the pastry dough and pressing it into a tart pan.
- Spread a layer of raspberry lemon filling onto the bottom of the tart shell.
- Gently place the raspberries on top of the filling, arranging them in a neat pattern.
- Carefully place the tart in the preheated oven and bake at the recommended temperature for the specified time.
- Once baked, remove the tart from the oven and allow it to cool before serving.
- Optionally, you can garnish the tart with fresh lemon zest or powdered sugar for added visual appeal.
Additionally, ensure that you follow the recipe’s instructions for preparing the filling and tart shell properly to achieve the desired results.
In terms of the history of assembling and baking tarts, this method has been used for centuries as a way to combine various flavors and create delicious desserts. Tarts have been enjoyed by people from different cultures, and the art of tart-making has evolved over time to incorporate different ingredients and techniques. Today, the process of assembling and baking a tart remains a popular culinary practice, allowing individuals to showcase their creativity and indulge in delightful flavors.
Get ready to bake, because this tart shell is about to become the delicious vessel for your raspberry and lemon dreams.
Preheating the oven and preparing the tart shell
- Preheat your oven to the specified temperature. This ensures a thorough bake.
- Grab the chilled, firm tart shell from the fridge. Remove any plastic wrap or parchment paper.
- If needed, dock or prick holes in the bottom of the tart shell with a fork. This stops air bubbles.
- Place it on a baking sheet or directly on an oven rack. Slide it in.
Different recipes may need blind baking. Check your recipe for instructions. Pro Tip: Brush a thin layer of beaten egg white over the raw tart shell before baking. This prevents sogginess.
Pour the filling in gently – not like your feelings after a breakup!
Pouring the filling into the shell
Prepare your filling. Get creative with a creamy custard, fruity compote, or other tasty combo. Roll out the crust into the pan – make sure it covers the bottom and sides evenly. Pre-bake the crust a few minutes to stop any sogginess. Let it cool, then pour in your filling.
For extra finesse, blind bake the crust: line it with parchment paper and pie weights. Use a piping bag to pour in delicate fillings or top with a pattern. Now you can enjoy a delicious tart bursting with flavor!
Baking the tart until golden
To get a perfectly golden crust, do these easy steps:
- Heat the oven to the temperature in the recipe.
- Put the tart on a lined baking sheet in the middle.
- Bake it for the time stated, so it’s gold & crisp.
- Keep an eye on it, so it doesn’t burn.
- Take it out & let it cool before serving.
For awesome results:
- Check the oven heat is right.
- Use a light-colored baking sheet.
- Put the tart on an upper-middle rack.
These tips work ’cause right oven temperatures mean even browning. A light-colored sheet reflects heat instead of absorbing it, stopping too much browning. Placing the tart on an upper-middle rack means air & heat circulate properly, giving a golden crust. Remember, a perfectly baked tart makes every bite delicious!
Step 4: Serving & Garnishing – make a plain tart a masterpiece with toppings! Wow your guests or yourself.
Step 4: Serving and Garnishing
Step 4: Serving and Garnishing
Brings the finishing touch to the raspberry lemon tart. Here’s a simple guide to make it a visually appealing and scrumptious masterpiece:
- Serve with Style:
- Carefully transfer the tart onto a serving dish or cake stand, ensuring the crust remains intact.
- Dust the top lightly with powdered sugar for an elegant touch.
- Optionally, garnish the tart with a few fresh raspberries and lemon zest to enhance its vibrant appearance.
- Accompaniments that Delight:
- Raspberry lemon tart pairs excellently with a dollop of whipped cream or a scoop of vanilla ice cream.
- For a tangy twist, serve alongside a citrus sorbet or lemon curd.
- Consider adding a sprig of fresh mint as a delightful garnish to complement the flavors.
- Perfect Portioning:
- Use a sharp knife to cut the tart into individual slices with clean edges.
- Ensure each slice receives a fair share of raspberries for an inviting presentation.
- To avoid a messy appearance, plate the slices using a thin spatula or cake server.
Impeccable presentation and careful attention to detail will beautifully showcase this raspberry lemon tart, leaving your guests eager to indulge.
In addition, serving the tart at room temperature allows its flavors to shine.
Fun Fact: Raspberry lemon tart is a classic dessert that originated in England in the 19th century. Its delectable combination of fruity and tangy flavors has made it a beloved treat worldwide. (Source: FoodHistory.com)
Be patient and resist the urge to lick the pan – your taste buds will thank you for it later.
Letting the tart cool and removing it from the pan
Cool the Tart: Place the tart on a heat-resistant surface and let it cool for 15-20 minutes. This will help the tart keep its shape.
Unstick the Tart: Run a thin knife around the edges of the tart to loosen it from the pan. Be gentle but firm. Put a flat plate over the tart.
Flip with Care: Put your hands firmly on either side, invert the pan and plate together and let the tart release onto the plate. Gently take off the pan. Sprinkle powdered sugar for a fancy touch.
Did you know that in French cuisine, tarts are called “tarte”, derived from Latin “tarta” meaning “round loaf or cake”? Make your tart look like something out of a magazine!
Decorating with fresh raspberries and lemon zest
Garnishing with raspberries and lemon zest can bring a burst of tartness and refreshing citrus flavor to your dishes. For a sweet twist, sprinkle them on cakes, tarts, or panna cotta. Go even lighter with yogurt parfaits or fruit salads. Or try a unique savory combination with roasted chicken or grilled fish. Even cocktails can benefit from these garnishes.
To add more complexity, try using edible flowers or mint leaves. Fun fact: Raspberries are thought to be a symbol of kindness, while lemon zest was highly valued by ancient civilizations for its aroma. So why not experiment with this classic combination in your own kitchen? You may just find a new favorite!
Conclusion
The Raspberry Lemon Tart is bursting with sweet and tangy flavors. Its buttery crust and zesty filling make it a crowd-pleaser. It combines the freshness of raspberries with the zing of lemon. The buttery crust adds crunch while the filling tantalizes your palate. Plus, it looks beautiful with red raspberries glistening on top.
For the perfect tart, select ripe and juicy raspberries. The burst of flavor from each berry enhances the overall taste experience. Use freshly squeezed lemon juice for an intense citrusy flavor.
This delectable dessert has its origins in 19th century French patisseries. Tarts were popular due to their versatility and ability to showcase seasonal fruits. The raspberry and lemon combination added brightness and depth to the pastry.
Frequently Asked Questions
Q: How long does it take to make a Raspberry Lemon Tart?
A: It takes approximately 2 hours to make a Raspberry Lemon Tart, including prep and bake time.
Q: What ingredients do I need for a Raspberry Lemon Tart?
A: The ingredients required for a Raspberry Lemon Tart are 1 ½ cups of graham cracker crumbs, ½ cup of melted butter, 1 cup of sugar, 3 tablespoons of cornstarch, ¼ teaspoon of salt, 1 ½ cups of water, 3 egg yolks (beaten), ⅓ cup of lemon juice, 1 tablespoon of lemon zest, 1 cup of fresh raspberries, and powdered sugar for dusting.
Q: Can I use frozen raspberries instead of fresh ones?
A: Yes, you can use frozen raspberries instead of fresh ones. However, make sure to thaw and drain them before using them in the tart.
Q: How do I store a Raspberry Lemon Tart?
A: To store a Raspberry Lemon Tart, cover it with plastic wrap or transfer it to an airtight container and refrigerate. It will stay fresh for up to 3 days.
Q: Can I use a different type of crust for the tart?
A: Yes, you can use a different type of crust for the tart. You can substitute the graham cracker crust with a traditional pastry crust or a cookie crust.
Q: Can I use lime juice instead of lemon juice?
A: Yes, you can use lime juice instead of lemon juice if you prefer a lime flavor. Adjust the quantity according to your taste.