How to Make Elegant Chocolate Dome Desserts at Home With Simple Garnishes
Glossy chocolate domes look like a pastry-case project, but they are surprisingly doable in a home kitchen. The key is to keep the structure simple: a smooth chocolate shell, a creamy filling, and one or two garnishes that add contrast. Think chocolate shavings, a green crumb topping, or a small fruity center that cuts through the richness.
If you want a polished dessert for a dinner party, holiday tray, or edible gift box, this is a smart place to start. You do not need professional pastry training. You just need decent chocolate, a mold or workaround, and enough chill time to let everything set properly.
What gives these desserts a bakery-style look
The elegant finish comes down to four things:
- A smooth shell: Even a basic melted chocolate shell can look beautiful if you coat the mold neatly.
- A rounded shape: Silicone dome molds make this easy, but a muffin pan lined with flexible liners can help you get close.
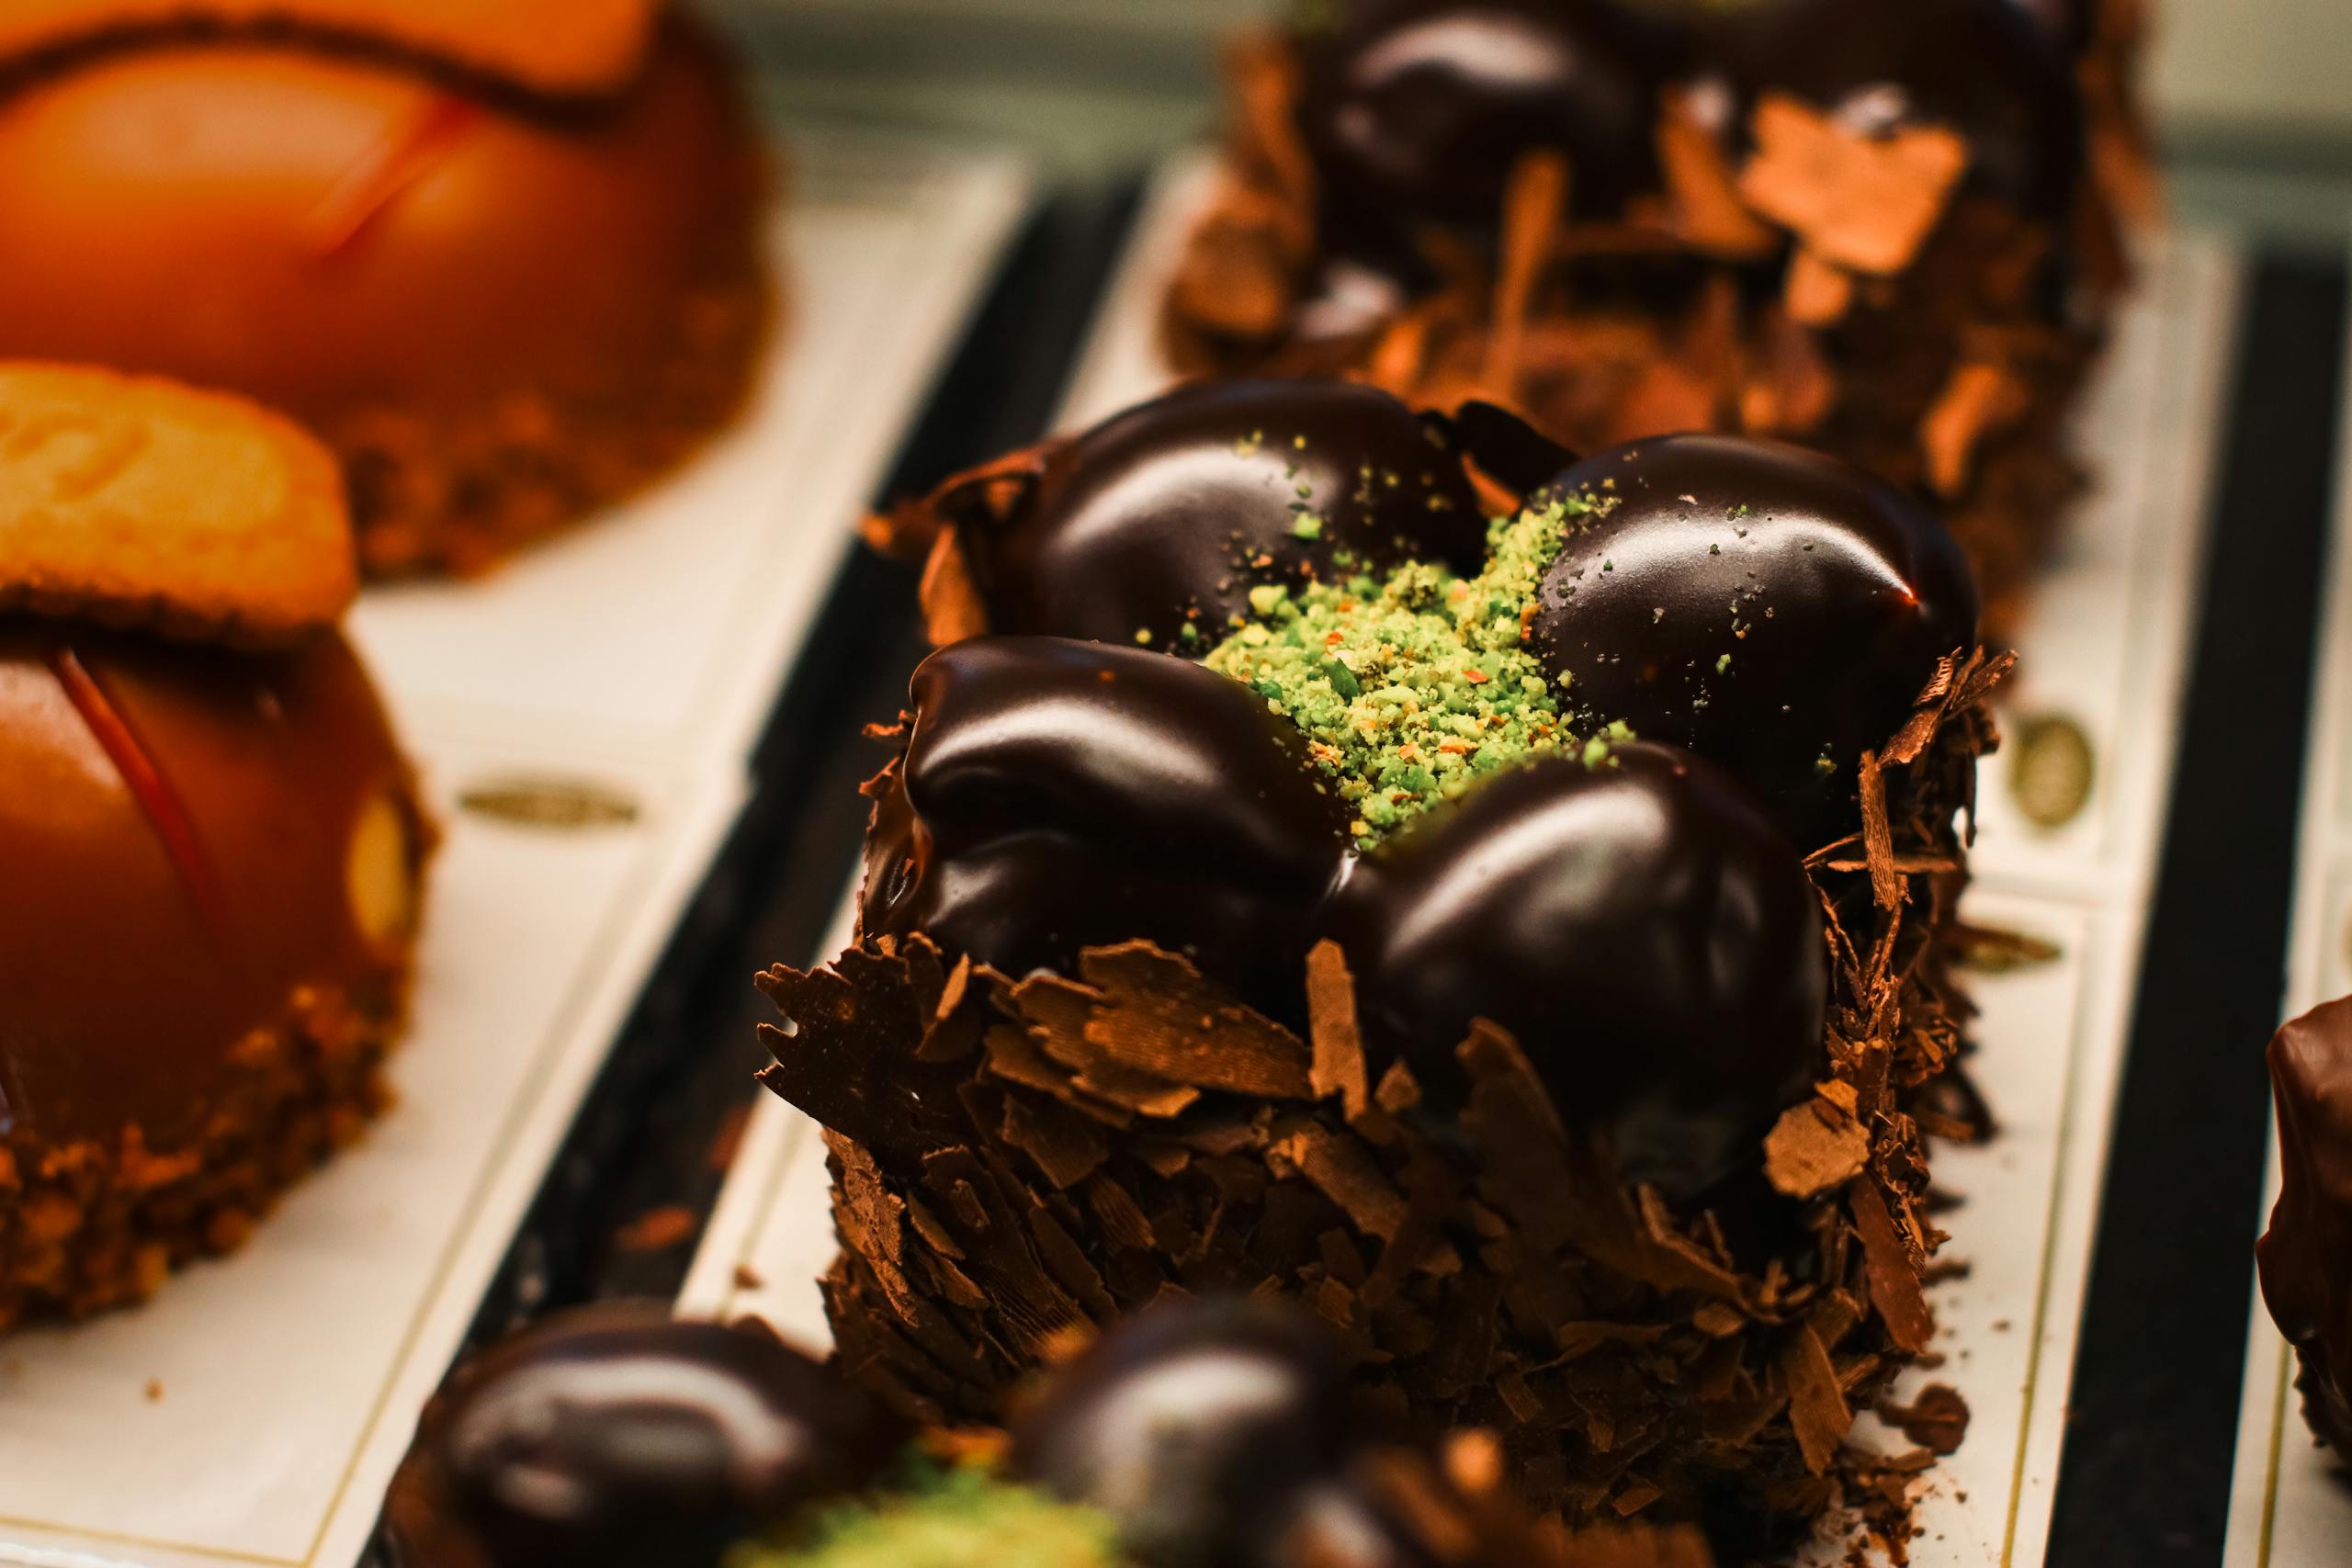
- A glossy finish: According to King Arthur Baking, tempered chocolate gives the shiniest finish and the cleanest snap, but simple melted chocolate still works well for home desserts.
- Contrast on top: A few chocolate curls, dark shavings, or a green crumb topping make the dessert look intentional and finished.
What you need
For the shell, choose a chocolate you enjoy eating out of hand. King Arthur Baking recommends using good-quality chocolate rather than candy melts if flavor matters most. Semisweet and bittersweet are both great beginner choices because they melt smoothly and balance sweet fillings well.
For equipment, silicone half-sphere molds are the easiest option. If you do not have them, use paper-lined muffin cups or silicone muffin pans for a rounded, individual dessert shape. They will not look exactly the same, but the method is still practical and attractive.
For filling, you have two easy paths:
- Ganache-based: Rich, smooth, and very forgiving.
- Mousse-style: Lighter and softer, with a more delicate texture.
Step 1: Make the chocolate shell
Melt your chocolate gently, either over barely simmering water or in short microwave bursts, stirring often. If you want a shinier shell and are comfortable taking an extra step, tempering is worth trying. King Arthur Baking explains that tempering helps chocolate set with better gloss and texture, but it is optional for a home version.
Brush or spoon a layer of melted chocolate into each mold cavity, making sure to coat the sides evenly. Chill until set, then add a second thin layer if needed. This helps prevent cracks when you unmold the shells.
If you are using muffin liners instead of dome molds, coat the inside lightly and chill the shells until firm enough to hold their shape.
Step 2: Choose an easy filling
For a simple ganache filling, use the basic approach from King Arthur Baking: hot cream poured over chopped chocolate, then stirred until smooth. Once cooled slightly, ganache can be spooned into shells as a silky center. You can keep it plain or add a little vanilla, espresso powder, orange zest, or peppermint extract.
If you want something lighter, a mousse-style filling is another approachable option. King Arthur Baking’s chocolate mousse guidance is helpful for home cooks who want a softer interior. A mousse-style center works especially well if you plan to serve the desserts well chilled.
Whichever route you take, leave a little room at the top so you can seal the dessert with more chocolate if needed.
Step 3: Assemble, chill, and finish
Fill the shells, then chill until the centers are firm enough to handle. If you are making full domes from two halves, warm a plate slightly and touch the edges of each half to it for a second before pressing them together. That helps create a clean seam.
Once assembled, let the desserts chill again before unmolding fully and decorating.
For garnish, keep it simple:
- Chocolate shavings or curls for height and texture
- A green crumb topping made from finely chopped pistachios, cookie crumbs tinted with a pinch of matcha, or mint-scented sugar crumbs
- A tiny spoonful of berry jam or fruit compote in the center for brightness
Try one easy variation
A mint-pistachio-style finish is especially pretty with dark chocolate. Use a smooth ganache or mousse filling, then top the dessert with chocolate shavings and a finely chopped pistachio crumb. If you want a little contrast inside, add a small dot of raspberry or cherry preserves before sealing.
The key is restraint. One rich filling and one bright accent will taste more balanced than stacking too many flavors together.
Make-ahead and storage tips
These desserts are a good make-ahead choice. You can prepare the shells a day or two ahead and store them in a cool room if your kitchen is not warm. Filled desserts with cream- or dairy-based centers should be refrigerated.
Nutrition.gov recommends following basic food-safety practices for chilled dairy foods, including keeping them cold and avoiding long room-temperature holds. For serving, take the desserts out just long enough to soften slightly for the best texture, then return leftovers to the refrigerator promptly.
You can also freeze many ganache-filled versions in an airtight container. Thaw them in the refrigerator so condensation stays under control. Mousse-style fillings are a bit more delicate, but they can still work well if handled gently.
A polished dessert without pastry-school pressure
Chocolate dome desserts are a great reminder that elegant presentation does not always require complicated technique. Start with a simple shell, choose either ganache or mousse, and finish with one thoughtful garnish. The result feels special enough for guests but manageable enough for a weekend baking project at home.