
Homemade Paneer – Soft, Fresh, and Perfect for Indian Dishes
Paneer is a type of fresh cheese that’s a staple in Indian cuisine, known for its soft texture and mild flavor. It’s incredibly versatile and can be used in a variety of dishes, from creamy curries like palak paneer to grilled kababs and even desserts. Making paneer at home is surprisingly simple and requires just two basic ingredients: milk and an acidic agent like lemon juice or vinegar. The result is a fresh, tender cheese that’s far superior to store-bought versions and can be customized to your taste and texture preferences.
Why Make Paneer at Home?
Homemade paneer is fresher, softer, and more flavorful than its store-bought counterpart. It also allows you to control the quality of the ingredients, such as using organic or full-fat milk for a richer texture. Making paneer at home is quick and easy, and it’s a fun kitchen project that results in a delicious cheese you can use in a wide range of dishes. Plus, it’s free from additives and preservatives, making it a healthier choice for you and your family.
Ingredients and Tools:
Making paneer requires just a few simple ingredients and basic kitchen tools. The process involves curdling the milk with an acidic agent, then draining and pressing the curds to form the cheese.
- Ingredients: Whole milk (or any high-fat milk), lemon juice or white vinegar, and optional seasonings like salt or herbs.
- Tools: A large pot, a fine mesh strainer or cheesecloth, a large bowl, and a heavy object for pressing the paneer.
Recipe: Homemade Paneer
- Yield: About 1 cup (200 grams) of paneer
- Serving Size: 1 ounce (28 grams)
- Approximate Nutritional Values per Serving:
- Calories: 80 kcal
- Total Fat: 6 g
- Saturated Fat: 4 g
- Trans Fat: 0 g
- Cholesterol: 20 mg
- Sodium: 5 mg
- Total Carbohydrates: 1 g
- Dietary Fiber: 0 g
- Sugars: 1 g
- Protein: 6 g
Ingredients:
- 4 cups (1 liter) whole milk
- 2-3 tablespoons lemon juice or white vinegar
- Optional: 1/4 teaspoon salt (for seasoning)
Instructions:
- Boil the Milk:
- Pour the milk into a large pot and heat it over medium heat. Stir occasionally to prevent the milk from sticking to the bottom and burning. Bring the milk to a gentle boil.
- Curdle the Milk:
- Once the milk starts to boil, reduce the heat to low. Gradually add the lemon juice or vinegar, one tablespoon at a time, while gently stirring. You’ll notice the milk begin to curdle and separate into curds (solid) and whey (liquid). If the milk doesn’t curdle completely, add another tablespoon of the acidic agent and stir gently.
- Strain the Curds:
- Once the curds and whey have fully separated, remove the pot from heat. Place a fine mesh strainer or a colander lined with cheesecloth over a large bowl. Pour the curdled mixture into the strainer, allowing the whey to drain away. If you want a firmer paneer, rinse the curds under cold water to remove the lemony or vinegary taste.
- Press the Paneer:
- Gather the cheesecloth around the curds and twist it to squeeze out any excess liquid. Place the wrapped curds on a flat surface, like a plate, and place a heavy object on top (such as a pot filled with water or a few cans) to press the paneer. Let it sit for about 30 minutes to an hour, depending on how firm you want the paneer to be.
- Unwrap and Store:
- Carefully unwrap the cheesecloth to reveal your homemade paneer. Cut it into cubes or slices as desired. Use immediately in your favorite dishes, or store in an airtight container in the refrigerator for up to 3 days.
Tips for Perfect Homemade Paneer:
- Use Full-Fat Milk: Whole milk yields the creamiest and richest paneer. You can also use a combination of whole milk and cream for an even softer texture.
- Don’t Over-Stir: Once the milk starts to curdle, stir gently to avoid breaking the curds into tiny pieces, which can make the paneer crumbly.
- Adjust the Firmness: For softer paneer, press it for less time or with less weight. For firmer paneer, press it longer and with more weight.
Flavor Variations for Paneer:
- Herb-Infused Paneer: Add fresh herbs like cilantro, mint, or parsley to the milk before curdling for a flavorful twist.
- Spiced Paneer: Mix in ground spices like cumin, black pepper, or turmeric into the curds before pressing to create a spiced version that’s perfect for grilling or frying.
- Garlic and Chive Paneer: Add minced garlic and chopped chives to the curds for a savory, aromatic paneer that pairs well with salads and appetizers.
Creative Ways to Use Paneer:
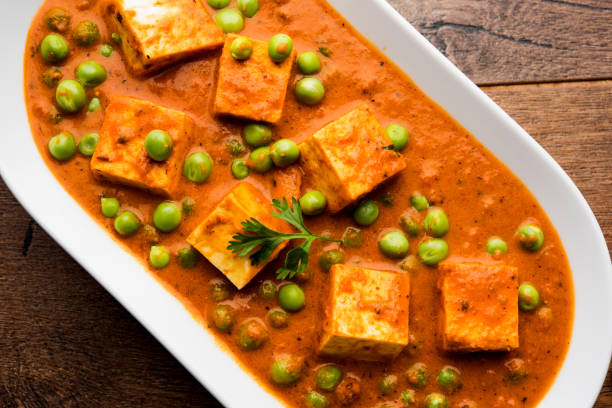
- Classic Curries: Use paneer in popular Indian dishes like palak paneer (paneer in spinach sauce), shahi paneer (paneer in a creamy tomato sauce), or paneer tikka masala.
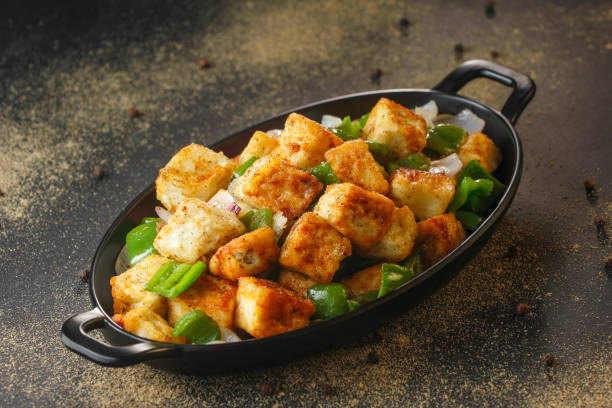
- Grilled or Fried Paneer: Marinate paneer cubes in spices and yogurt, then grill or fry them for a delicious snack or appetizer.
- Paneer Desserts: Crumble paneer and use it in Indian desserts like rasgulla or sandesh for a sweet treat.
Storing Homemade Paneer:
Homemade paneer can be stored in the refrigerator for up to 3 days. To keep it soft and moist, place the paneer in a bowl of water and cover it tightly. Change the water daily. For longer storage, freeze the paneer in an airtight container for up to 2 months. Thaw it in the refrigerator before using.
Health Benefits of Paneer:
Paneer is an excellent source of protein, making it a great addition to vegetarian and high-protein diets. It’s also rich in calcium, which supports bone health, and contains essential vitamins and minerals like phosphorus and B vitamins. Including paneer in your diet can help with muscle growth, weight management, and overall health.
Fun Fact:
Did you know that paneer is one of the oldest cheeses in the world? It has been made in India for thousands of years and is a key ingredient in many traditional dishes. Unlike most cheeses, paneer doesn’t melt, making it ideal for cooking in curries and stir-fries.

